
Using a multimeter to find a shorted electric motor winding involves measuring the resistance of the motor windings and looking for a significantly lower resistance than expected
Ensuring safety and following meticulous procedures is very important to safeguard both personnel and equipment when working with electric motors. Before delving into testing procedures, we need to initiate a thorough safety protocol. Begin by disconnecting power and adhering to proper lockout/tagout procedures. This sets the foundation for a secure testing environment.Once safety measures are in place, the rest of the steps can be methodically executed for accurate testing and motor winding analysis.
 Here’s our step-by-step guide on how to do this:
Turn off Power:
- Disconnect power to the motor. This may involve shutting off a circuit breaker or isolating the motor from the power source.
Disconnect Motor Leads:
- Disconnect the motor leads from the power source and any control circuit.
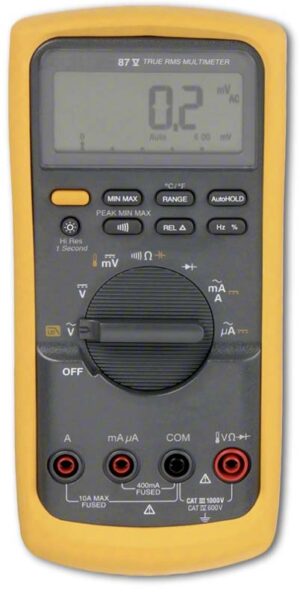
Set Multimeter:
- Set your multimeter to the resistance (ohms) mode. Choose an appropriate range for the expected resistance of the motor windings. If you’re unsure, start with a high resistance range.
Identify Motor Windings:
- Identify the motor winding leads. Motors typically have multiple windings (common, start, run, etc.).
Measure Resistance:
- Connect the multimeter leads to two of the motor winding leads. Repeat this for each combination of winding leads.
A healthy motor winding should have a resistance within the expected range. Consult the motor’s technical documentation for the correct resistance values.
Compare Readings:
- Compare the resistance readings between the windings. If one winding shows significantly lower resistance compared to the others, it may indicate a short circuit.
Check for Continuity:
- If you suspect a short, you can also check for continuity between each motor winding and the motor frame. There should be no continuity between the winding and the frame. If continuity exists, it suggests a short to the motor frame.
Visual Inspection:
- Perform a visual inspection of the motor windings for any signs of physical damage, such as burned insulation or obvious short circuits.
Interpret Results:
- If you find a winding with significantly lower resistance or continuity to the frame, it indicates a shorted winding. This could be due to insulation breakdown, physical damage, or other issues.
Repair or Replace:
- If a shorted winding is identified, you may need to repair or replace the motor. Repair might involve rewinding the motor or addressing the specific issue causing the short.
Final Thoughts…
Remember to consult the motor’s technical documentation for specific resistance values and other testing guidelines. If you are unsure or uncomfortable with the process, it’s advisable to seek assistance from a qualified electrician or technician.
Bookmark ElectricalTechSkills.com or sign up to our email list to get more helpful tips as we post them!